The scanner is run by a small computer inside the base unit. Although it very rarely happens, the computer could encounter an issue and as a result needs to be replaced. This guide will take you through the process of switching the computer.
- Turn off the scanner by unplugging the power cord. Make sure to also disconnect the ethernet cable if it is connected.
- Thereafter carefully remove the towers by:
- pulling them straight up, or
- detach them from the underside of the tower slot
- Turn the scanner upside down and place it on an even surface. Please note that the towers must be removed for this step.
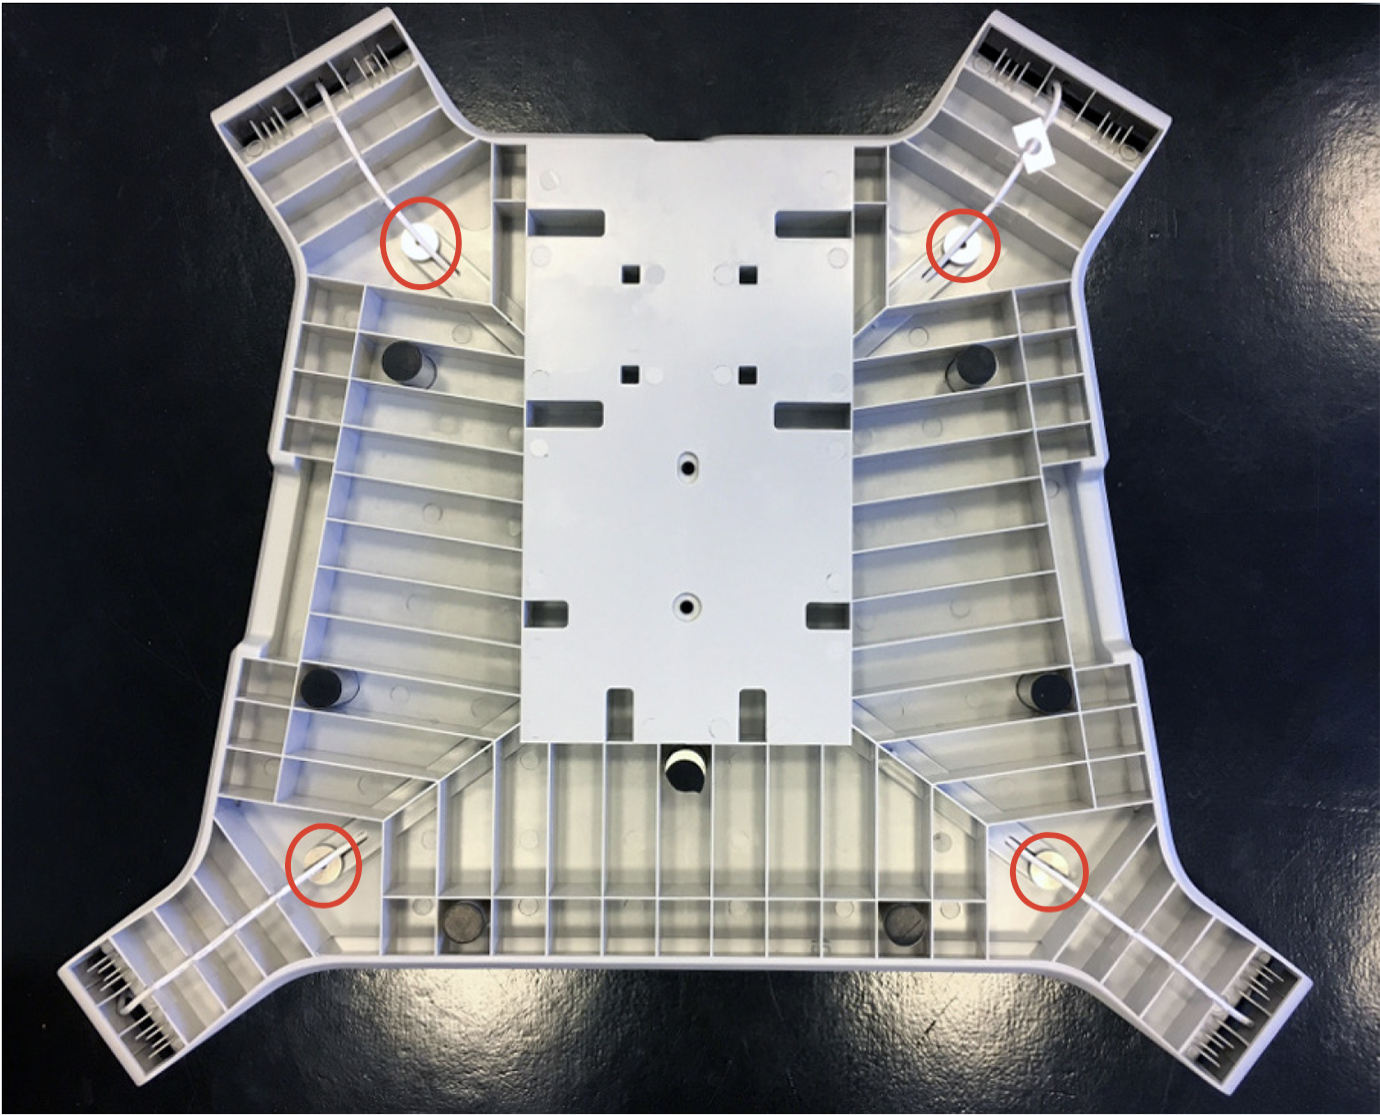
- Unscrew the four thumb screws by hand. You can find them in each corner of the scanner. (See picture below)
- Turn the scanner back to its original, upright position. Note that you now have detached the top plate by unscrewing the screws. Make sure you have a good grip on both the scanner's bottom and top before you lift it.
- Unplug all the cables from the internal computer as you would a regular USB, don’t worry about damaging the computer as it is already faulty.
Please note! The Wi-Fi stick is attached to the base unit with double-sided tape. Gently pull it from the plastic to fully remove the cable. - The computer is fixed inside the base unit with two screws on the underside of the scanner. The screws can be found and removed by lifting the scanner to a vertical position. Please keep your hand on the computer while unscrewing the two screws to prevent the computer from falling out.
- Carefully remove the computer from the base unit.
- Prior to installing the new internal computer into the scanner, verify the model of the NUC by looking at the underside. It will be labeled as either "NUC10", "NUC11" or "NUC12".


How to connect the NUC10


How to connect the NUC11 or NUC12


When the new internal computer is plugged in
- Make sure that the new computer works by plugging in the power cord to turn it on. The lights should turn on if the device is working as expected.
- Turn the scanner off again by unplugging the power cord. Make sure all cables are inside the scanner or in the canals leading to the towers. Close the scanner by following steps 5 and 4 listed above (step 5 first, followed by step 4).
- Turn on the scanner by plugging in the power cord again. If the scanner uses an ethernet connection, connect this to the scanner as well.
NOTE: Should you encounter any difficulties or require assistance with installation, please feel free to contact our dedicated support team. Our agents are available to provide guidance and answer any queries you may have. Below is a list of our support numbers:
- For English language support: +1 (888) 850-1019
- Pour l'assistance en français: +33 (0) 80 522 0684
- Für Deutschsprachige Unterstützung: +49 (0) 800 180 8165
- Für Unterstützung auf Österreichisch: +43 (0) 800 80 2549
- Für Unterstützung in der Schweiz (Deutsch): +41 (0) 800 56 1281